What It Does
- Provides a dedicated wall-mounted spot for wallet, keys, and mask storage
- Angled shelf design ensures wallet sits securely without sliding
- Three integrated hooks below shelf for hanging keys and small items
- Mounts flush against wall with minimal protrusion for space efficiency
- Custom-designed dimensions to fit specific wallet size and clearance needs
- Serves as an "entry drop zone" for daily items near door and light switch
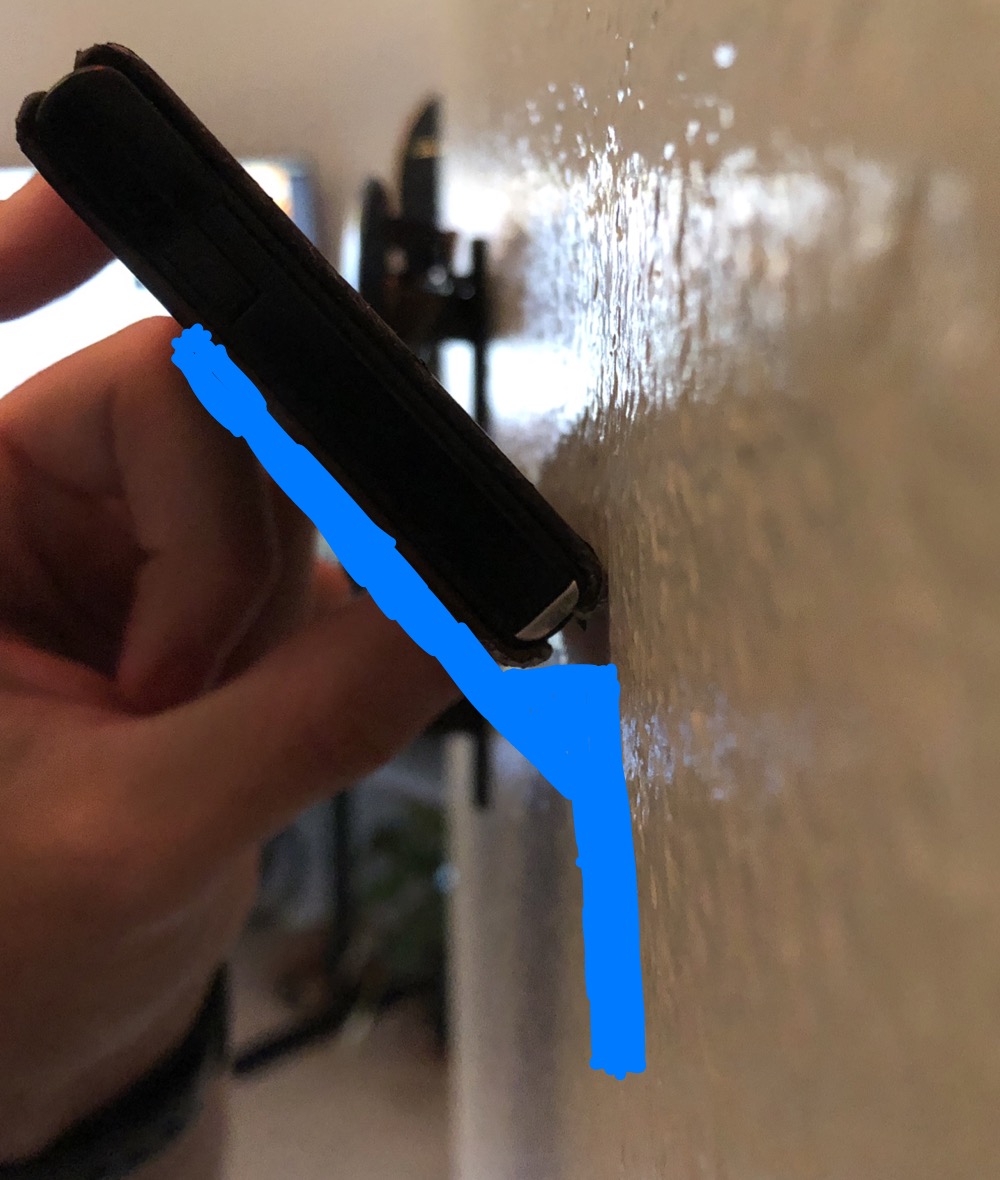 The original idea: testing the wallet angle against the wall and sketching the first bracket concept.
Why I Built This
I needed a better way to organize my everyday carry items near the entryway. Wallets don't hang well on hooks, and laying them on a shelf takes up too much horizontal space. I wanted something compact that would hold my wallet at an accessible angle while also providing hooks for keys.
Rather than buying a generic organizer that wouldn't fit my exact needs, I decided to design and 3D print a custom solution. This let me control every dimension: the shelf angle, the depth needed to support my wallet, the hook spacing for my keyring, and the overall footprint to fit next to my light switch.
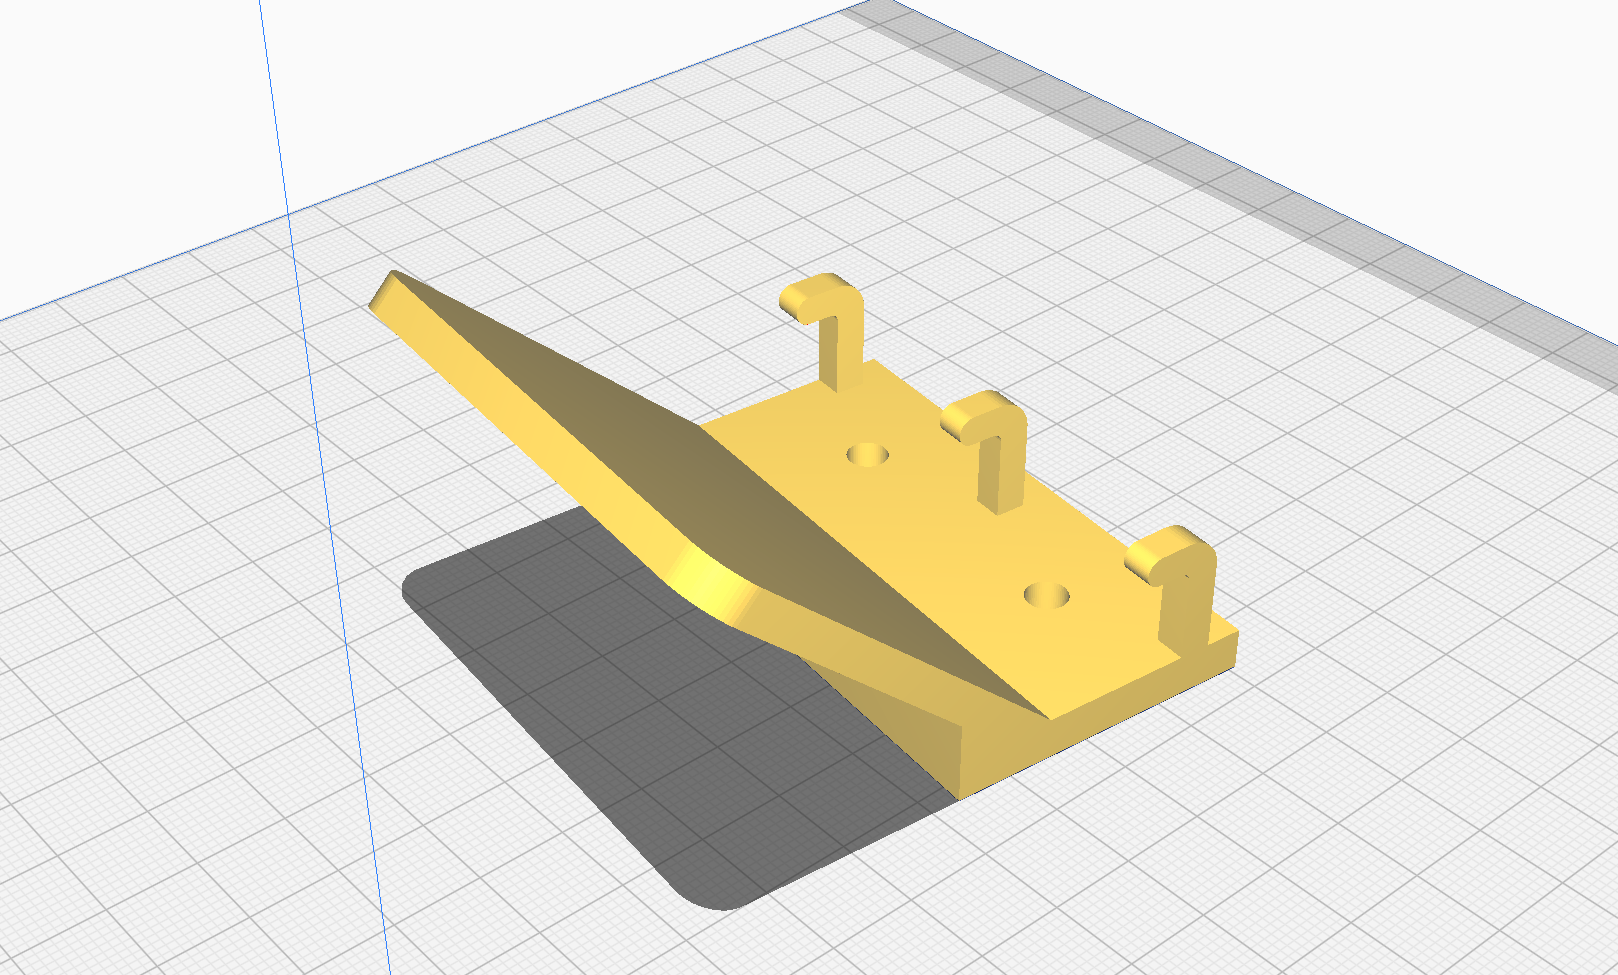 First 3D concept: translating the angle test into a geometric model with shelf, hooks, and mounting points.
How It Works
The design process started with a physical test: holding my wallet against the wall at different angles to find the sweet spot between accessibility and security. I photographed this and drew a blue wedge shape over it to represent the bracket I'd need to create that angle.
I then modeled the hanger in 3D CAD software, using the reference photo as a backdrop to ensure the virtual model matched my real-world test. The design includes a sloped platform (the "shelf"), a vertical back plate for wall mounting, three cylindrical hooks for keys, and mounting holes for screws. I refined dimensions through sketching: 96mm width, 65mm depth, hook diameters of 5-10mm, all chosen to balance strength, printability, and functionality.
The final model was exported as an STL file and 3D printed in a single piece. The angled geometry prints without support structures, and the material (likely PLA or PETG) provides enough rigidity to hold a wallet and keys without flexing.
 Design notebook: sketching dimensions, views, and hook details to plan the model before finalizing in CAD.
Design Process
Step 1: Physical angle testing – I held my wallet against the wall at various angles, photographed the best one, and drew a simple wedge shape to visualize the bracket.
Step 2: Initial 3D modeling – I created a basic geometric version of the wedge in CAD software, adding hooks and mounting holes to make it functional beyond just a wallet shelf.
Step 3: Dimensioning and sketching – Using my iPad as a design notebook, I drew front and side views, labeled measurements (width, depth, height, hook diameter), and embedded the reference photo to keep the real-world context visible while planning.
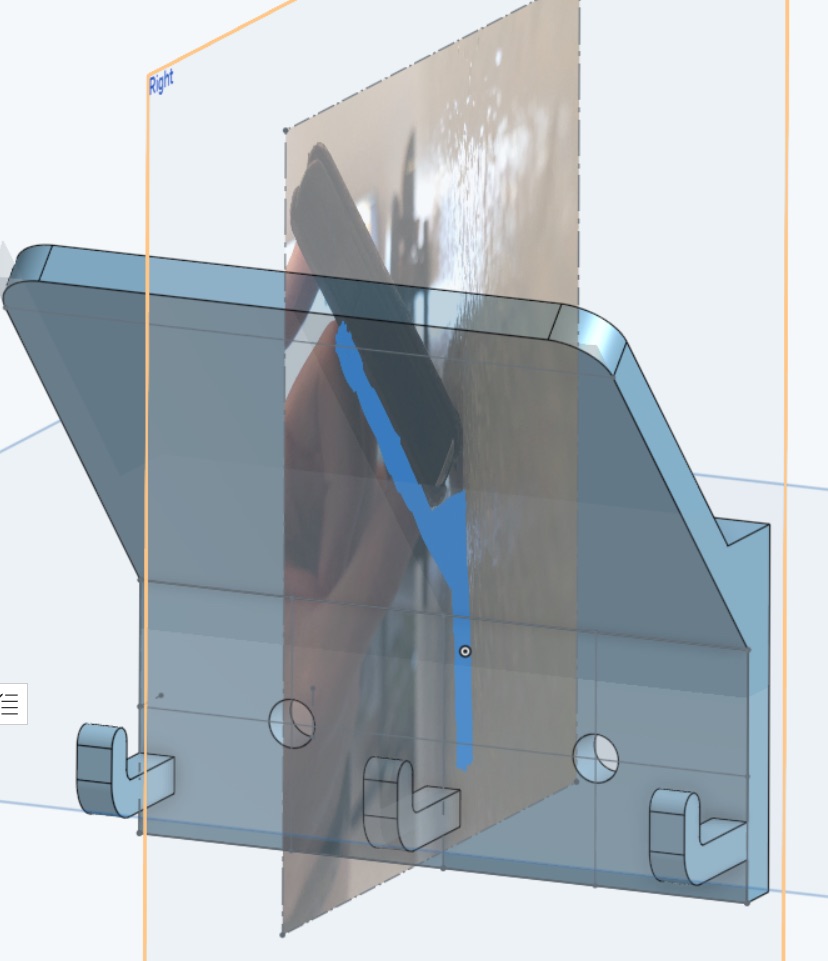
Step 4: Model refinement – I imported the angle-test photo into the CAD environment as a transparent reference plane, then adjusted the 3D model to match. This ensured the virtual design would feel right when installed.
Step 5: Printing and installation – Once satisfied with the model, I printed it, mounted it to the wall near my entryway, and tested it with my actual wallet and keys. It's been in daily use ever since.
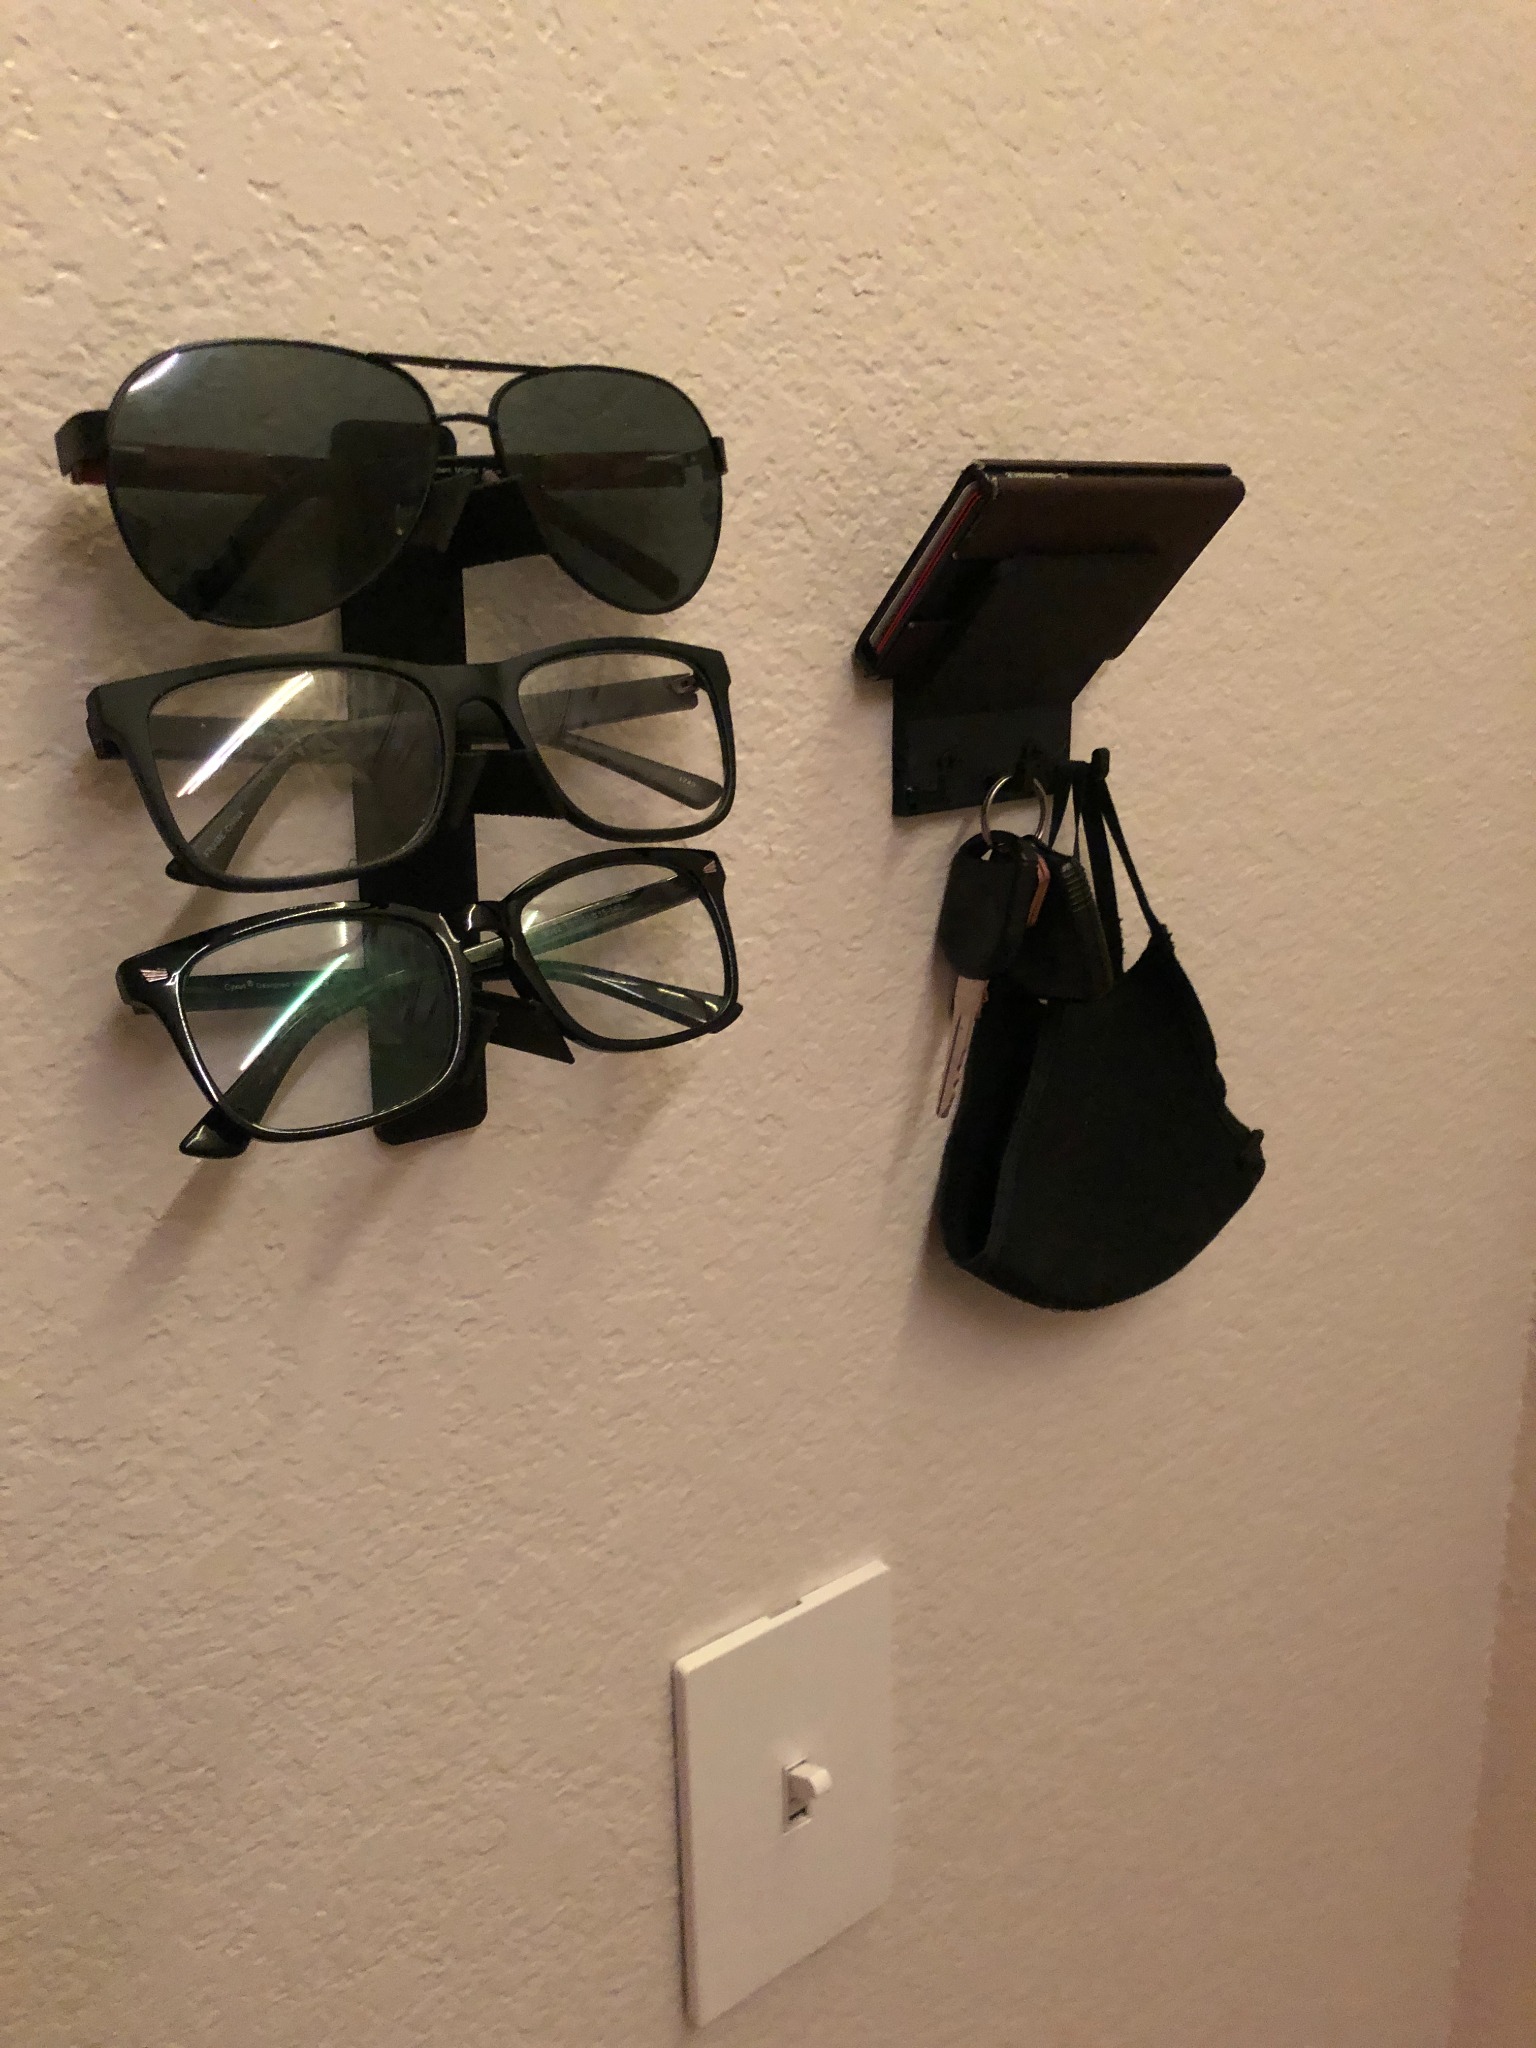 The hanger installed in context: wall-mounted near the entryway alongside other organizers.
Impact
By the numbers:
- In daily use since October 2021 (3+ years of continuous service)
- Single-print design with no assembly required
- Custom-fit to exact wallet dimensions and entryway space constraints
What changed:
- Eliminated pocket clutter and "where did I put my wallet?" moments
- Created a consistent drop zone for keys, wallet, and mask when entering/leaving
- Proved that designing custom organizers is faster and more satisfying than hunting for the "perfect" product online
- Reinforced 3D printing as a practical tool for solving everyday annoyances, not just for prototypes or toys
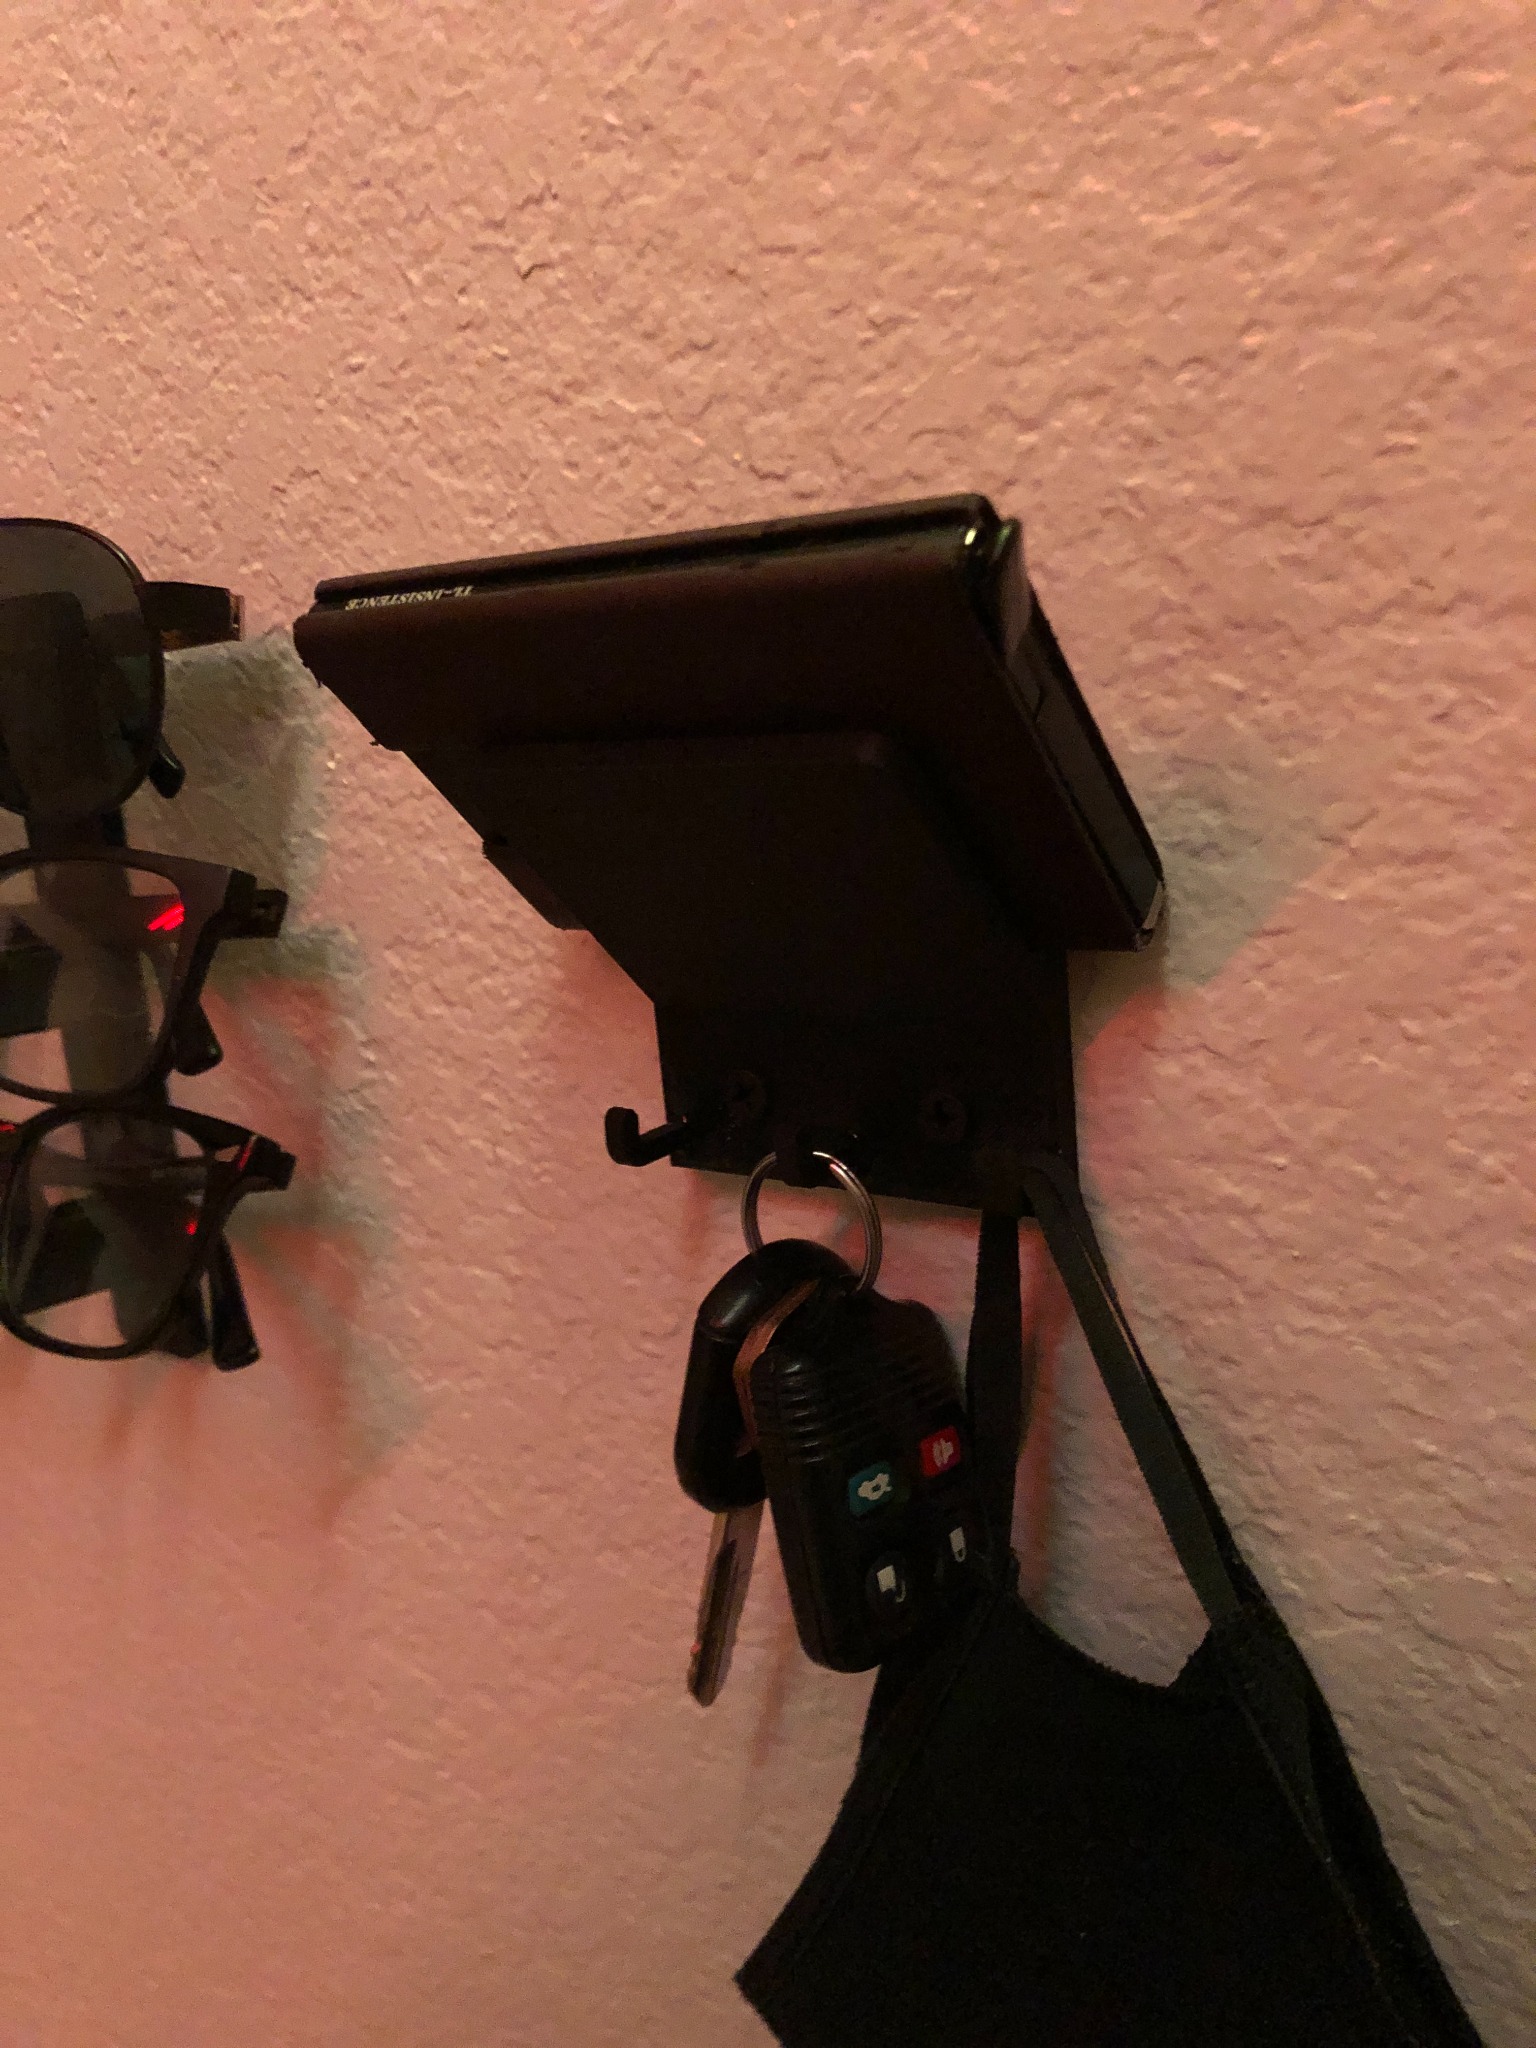 The finished product in use: wallet secure on the angled shelf, keys and mask hanging from hooks below.
Challenges & Solutions
The hardest part was nailing the angle. Too steep and the wallet would slide off; too shallow and it would stick out too far from the wall and look awkward. I solved this by doing a physical test first—actually holding the wallet where I wanted it—before committing to any modeling. This saved me from printing multiple failed prototypes.
Another challenge was hook sizing. I needed them thick enough to be strong but thin enough to easily slide keyrings on and off. I sketched several hook diameter options (5mm, 10mm) and chose a middle ground that worked for both standard keyring sizes and carabiner clips.
What I Learned
I learned that the best way to design physical objects is to start in the real world, not the computer. Holding the wallet against the wall and taking a photo gave me a reference point that felt right, which I could then translate into precise geometry. Starting with sketches and dimensions in a notebook (even a digital one) bridges the gap between "rough idea" and "CAD-ready model."
I also learned to design for printability from the start: the angled geometry means this prints without support material, saving time and filament. And I learned that custom solutions don't have to be complicated—this is essentially a sloped shelf with hooks, but because it's tailored to my exact needs, it works better than any generic organizer I could buy.
Future improvements:
- Add a shallow lip to the front edge of the shelf to prevent wallet from sliding forward if bumped
- Design a modular version with removable hook inserts for different item types (carabiners, sunglasses, etc.)
- Experiment with wood-filled or textured filaments for a more finished aesthetic
- Create a parametric model that automatically adjusts dimensions based on wallet size input
Links
- STL Files: Available upon request
- Design Files: Private (CAD source files)
- Related Projects: Other 3D printed organizers and functional home items