What It Does
- Repurposes a Lenovo N22 Chromebook into a dedicated wall-mounted display
- Displays photos, wallpapers, or web-based content in kiosk mode
- Mounts flush to the wall with keyboard hidden behind the screen
- Uses existing Chromebook functionality for network connectivity and power
- Creates an entryway command center paired with a 3D-printed organizer
- Provides a low-cost alternative to dedicated digital photo frames
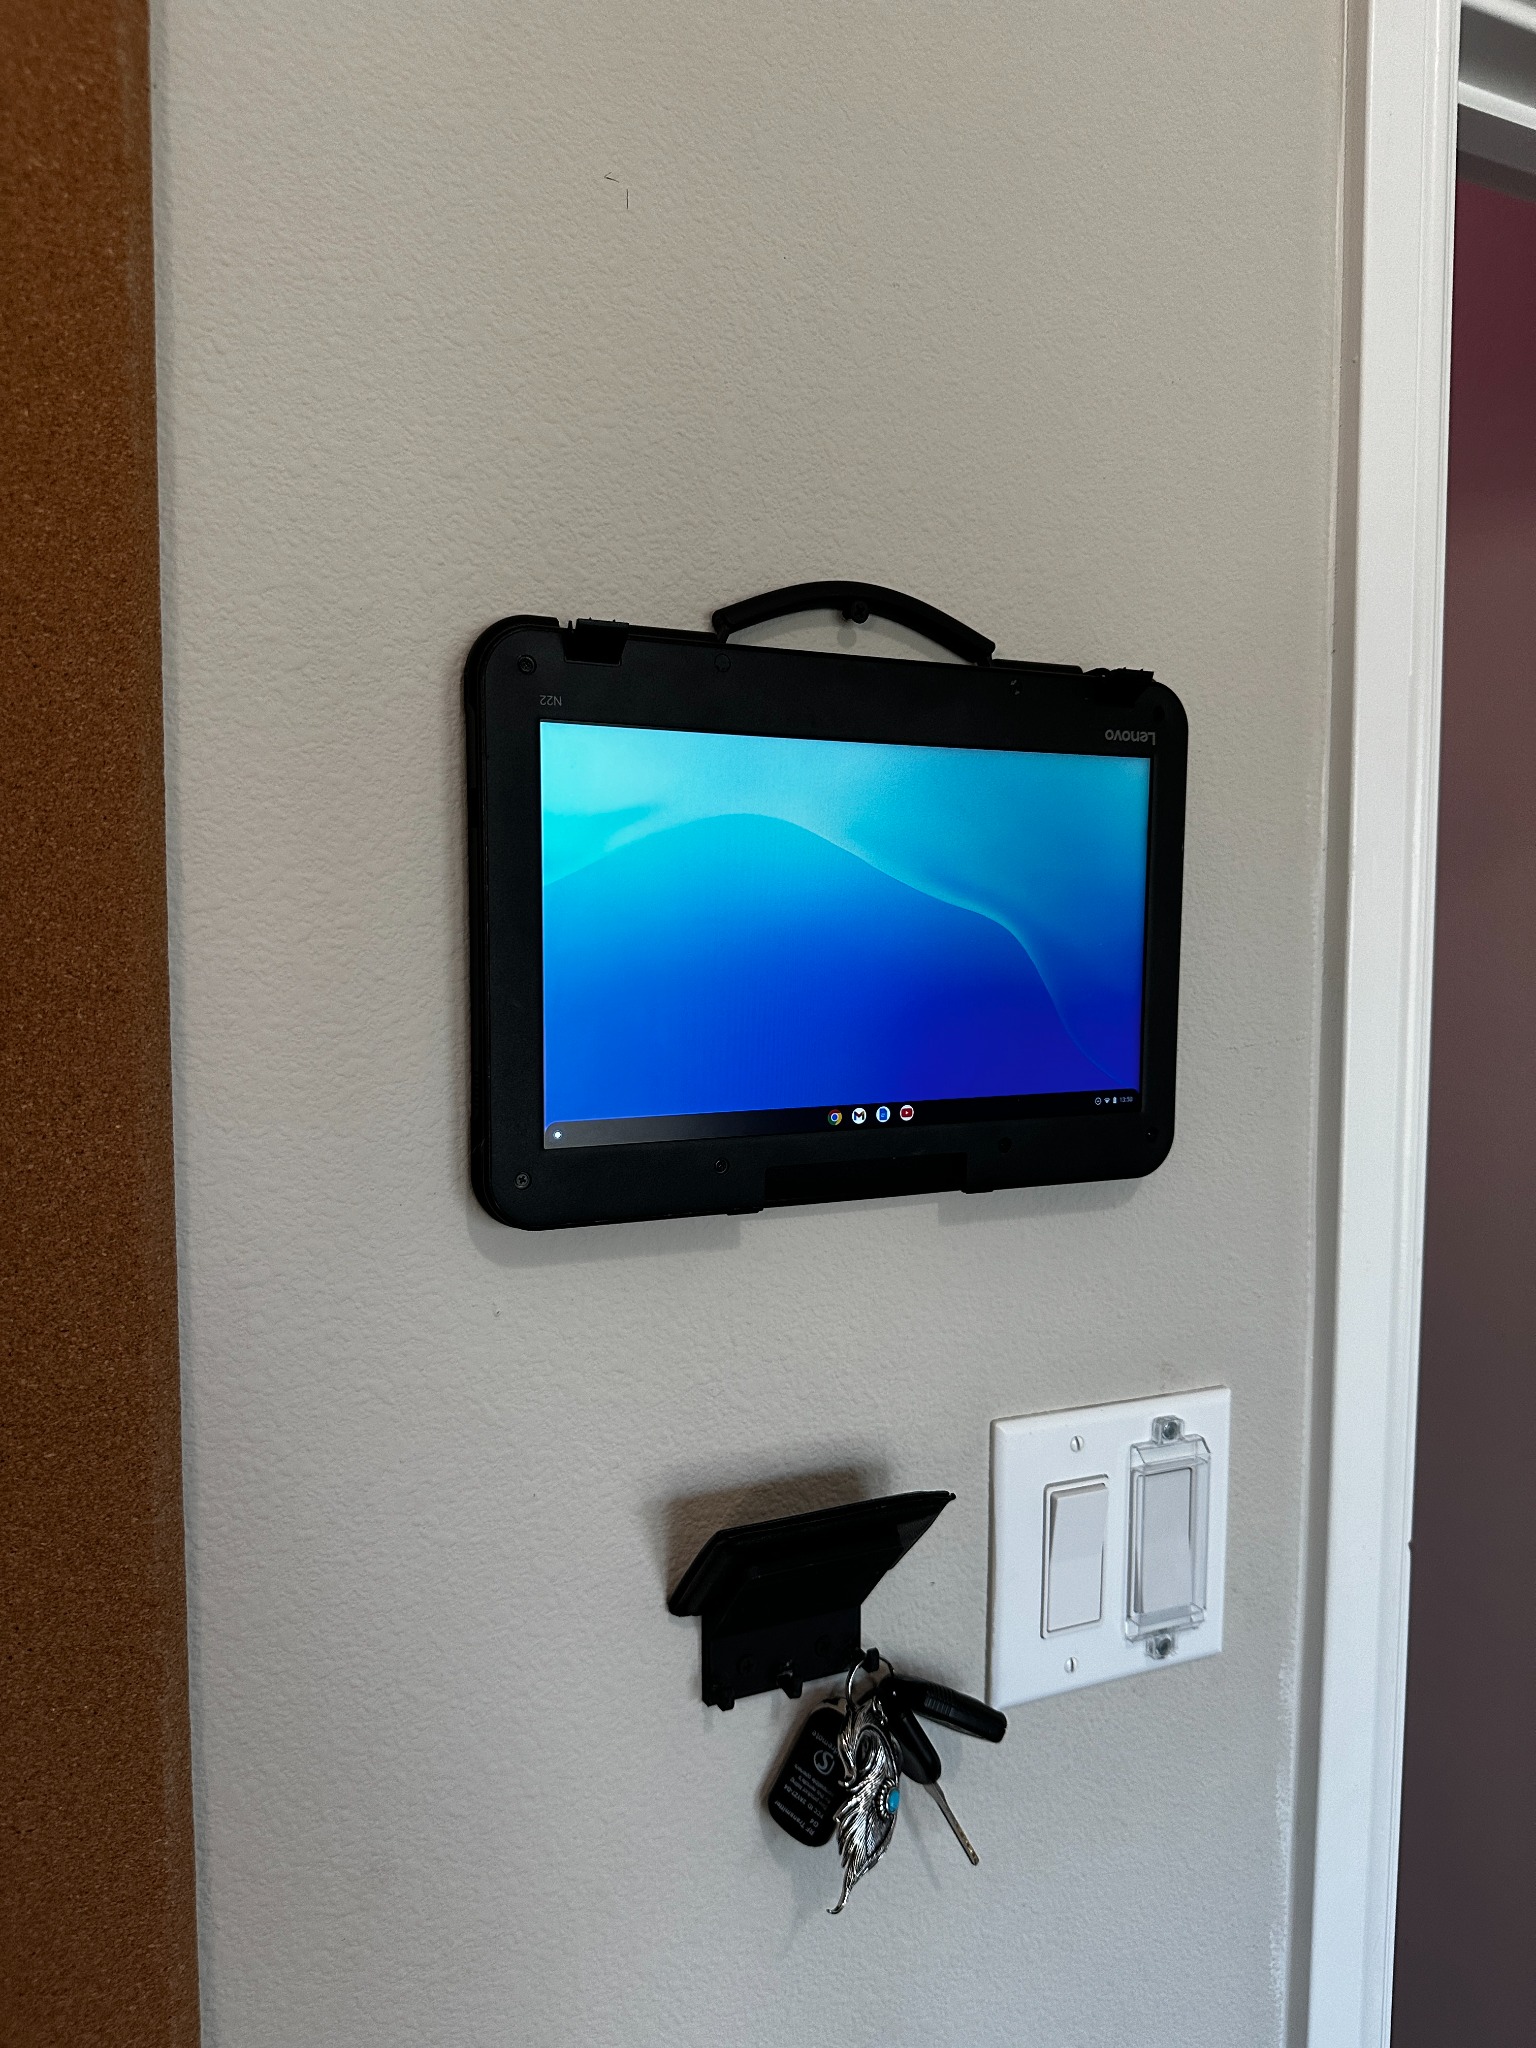
 The final wall-mounted display, centered and level with the hinge at bottom and carry handle at top.
Why I Built This
I wanted a digital photo frame for my entryway that could display rotating photos and information. Instead of buying a dedicated digital frame with limited features and connectivity, I realized I could repurpose an inexpensive Chromebook. The Lenovo N22 was perfect: cheap, functional, and with a decent screen. The challenge was figuring out how to modify it from a clamshell laptop into a wall-mountable display.
The idea was to create something that looked intentional and clean—not like a laptop awkwardly stuck to the wall. I wanted the screen to face outward while the keyboard and internals faced the wall, creating a flush, purpose-built appearance. Plus, it would pair perfectly with my 3D-printed wallet and key hanger to create a complete entryway organization station.
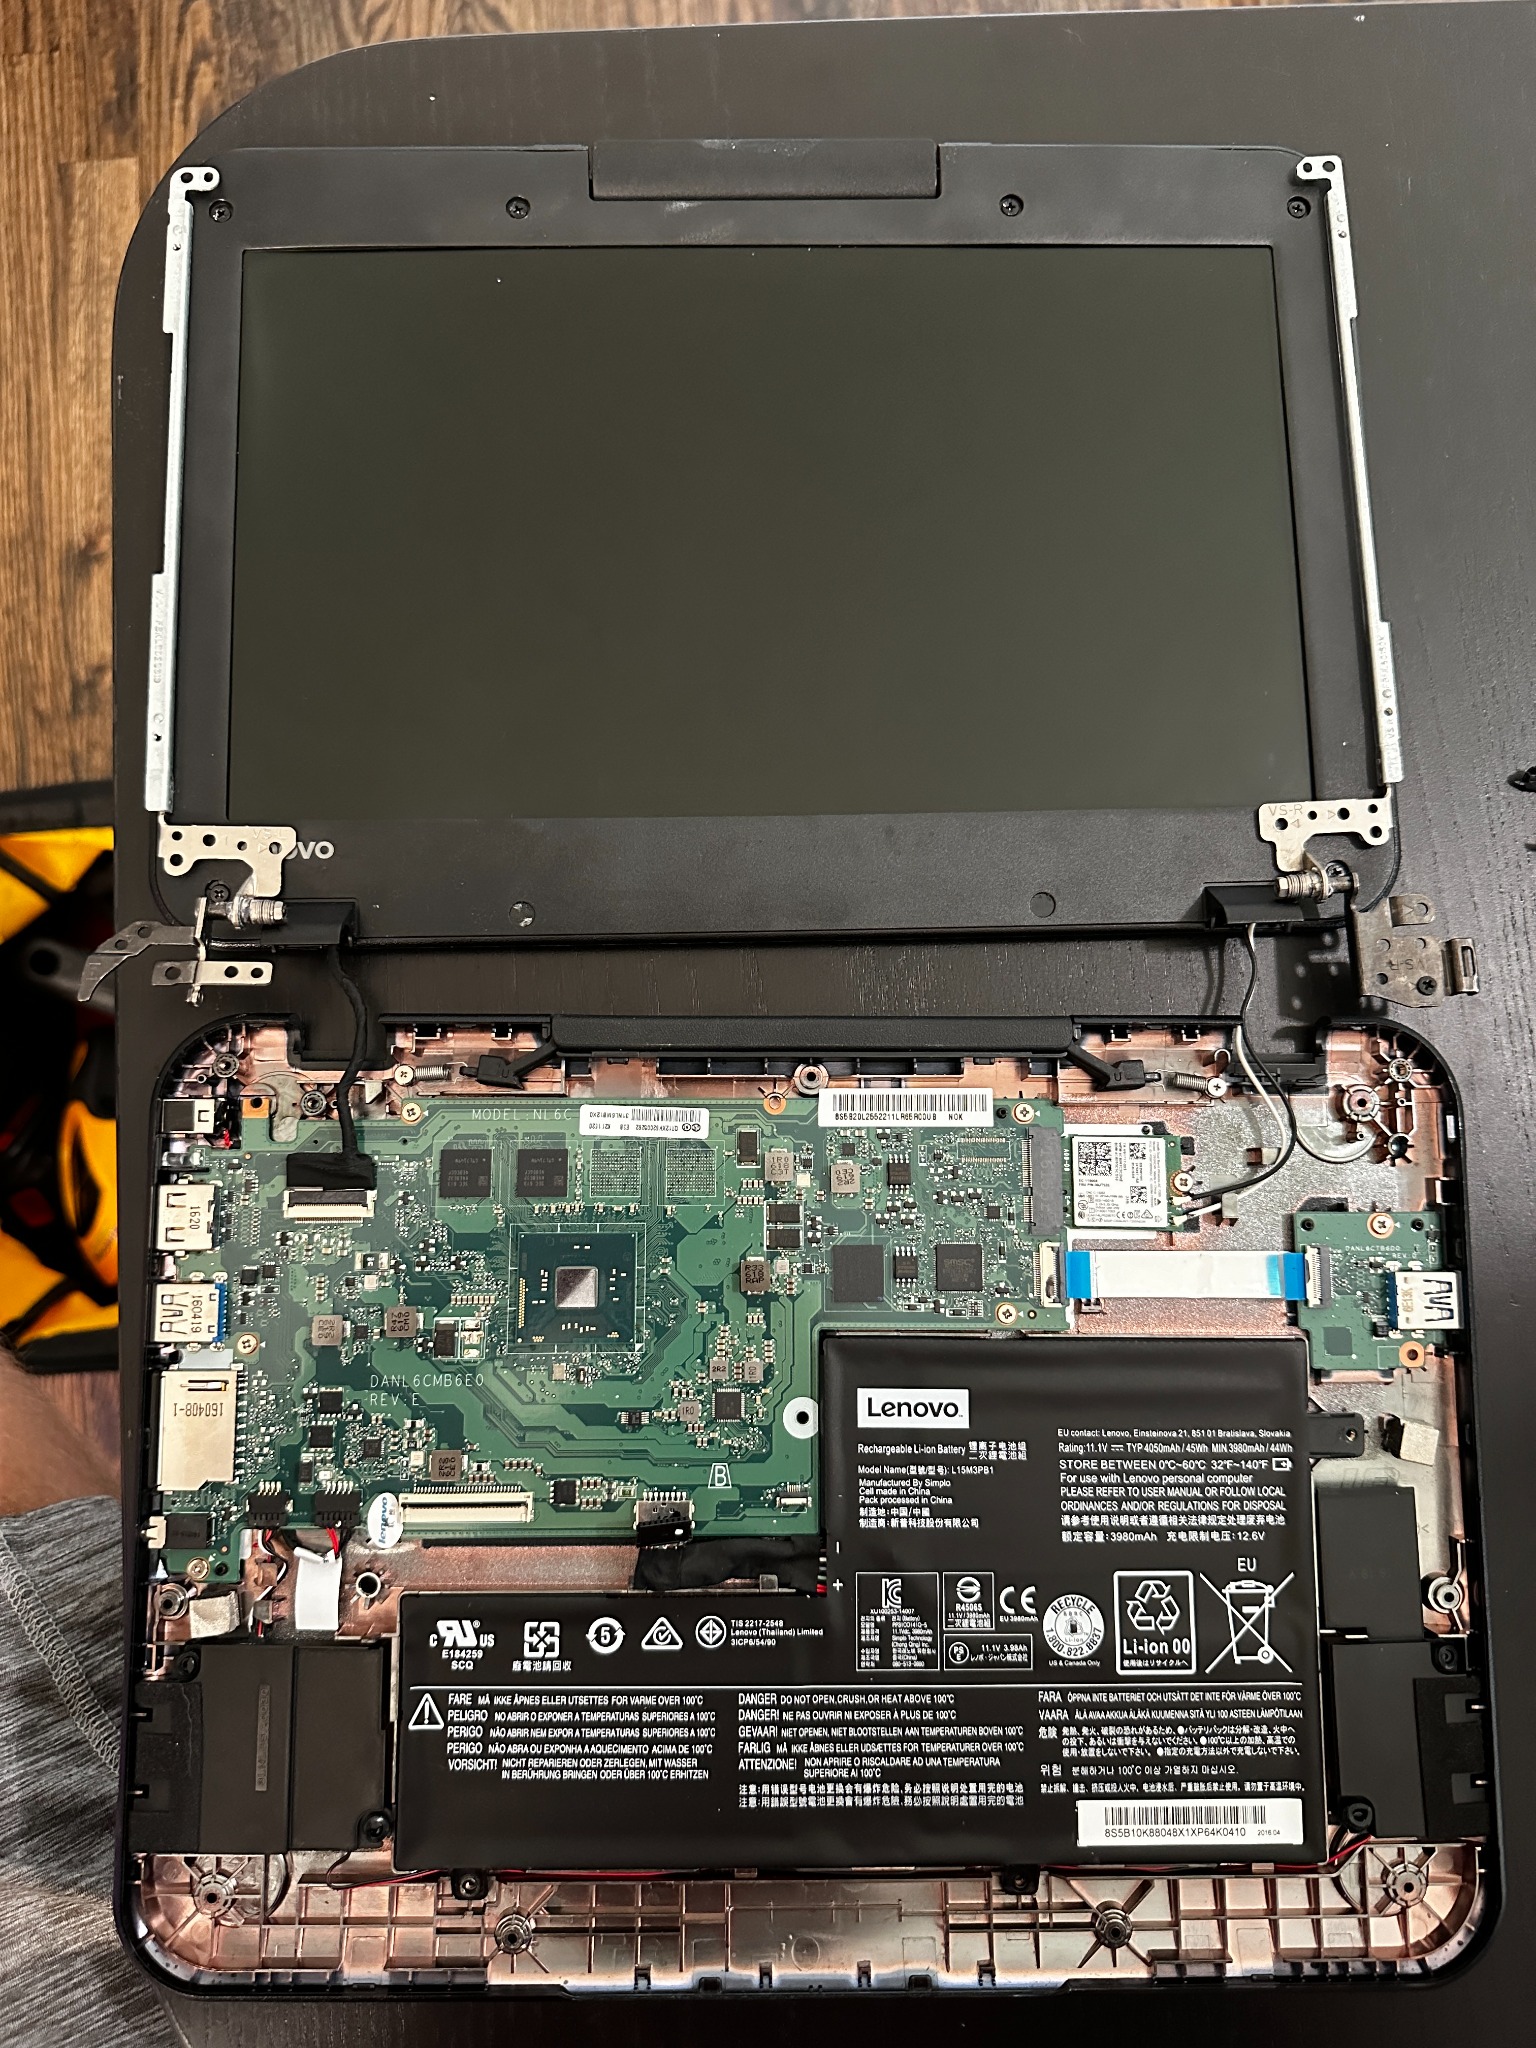
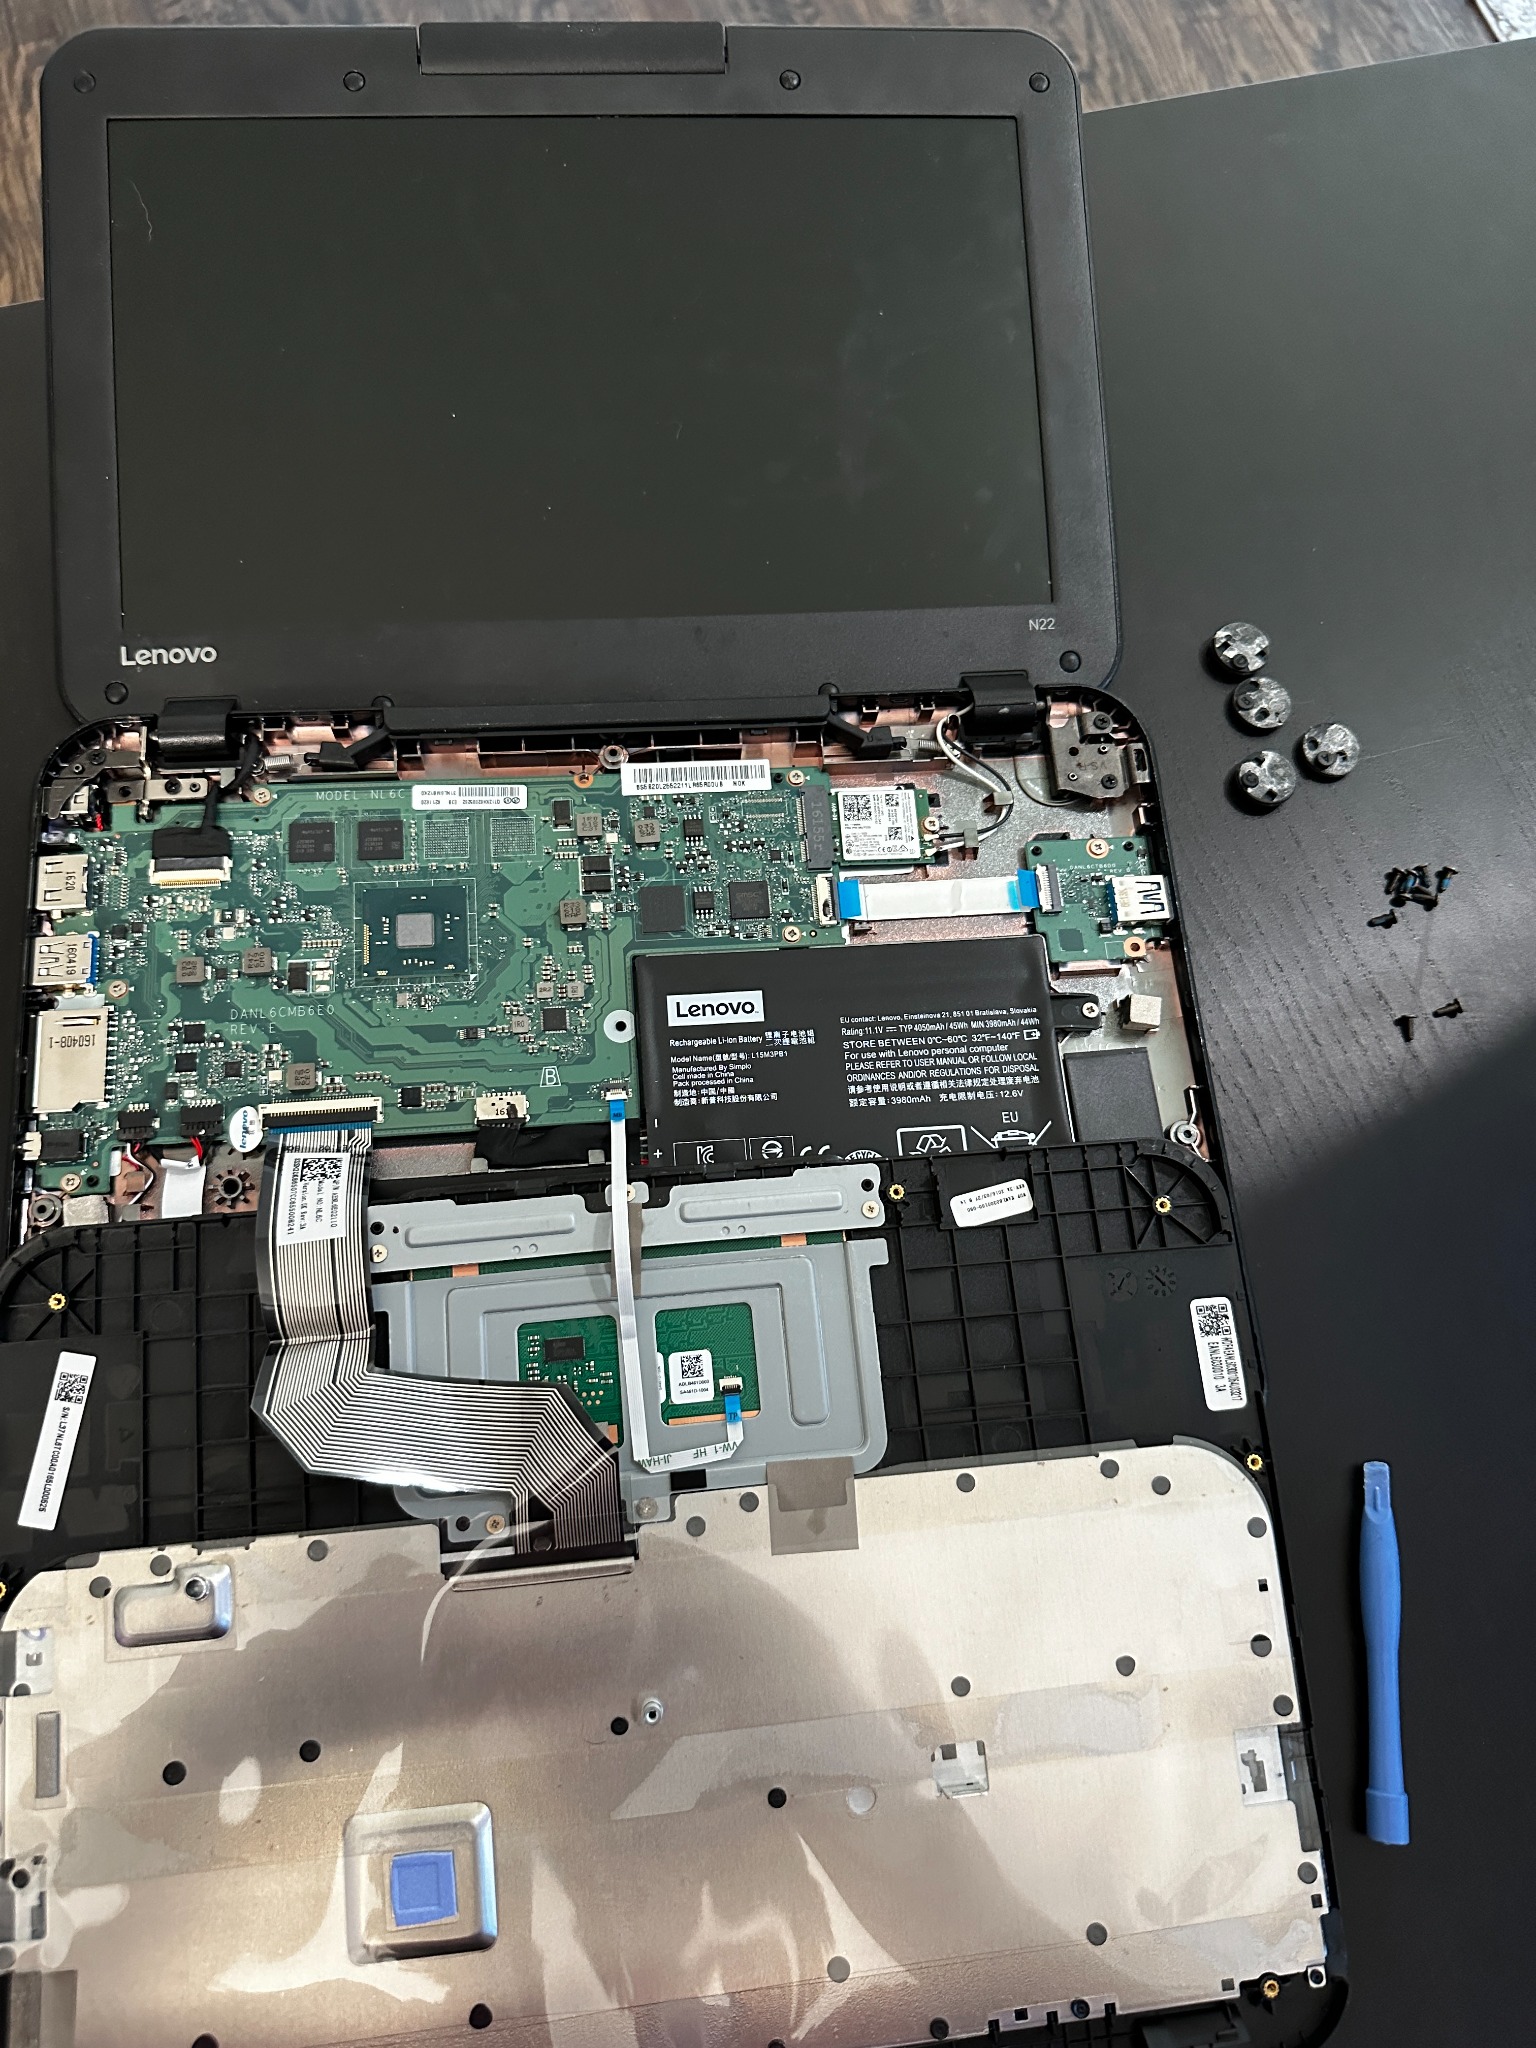 First teardown: exposing the motherboard, battery, and internal components to understand the structure.
How It Works
The conversion started with a complete disassembly of the Lenovo N22 Chromebook. I removed the keyboard assembly to expose the motherboard, battery, and display connections. The key modification was altering the hinge mechanism to allow the screen to rotate 360 degrees, enabling the keyboard to fold completely behind the display panel.
I stripped away unnecessary cosmetic parts from the lid assembly to reduce bulk and make the final product less "laptop-like." After testing the modified hinge mechanism and confirming all cables could route safely without pinching, I reassembled the device in its new configuration. The Chromebook boots normally and runs ChromeOS, but now functions as a dedicated kiosk display showing full-screen photo slideshows or web applications.
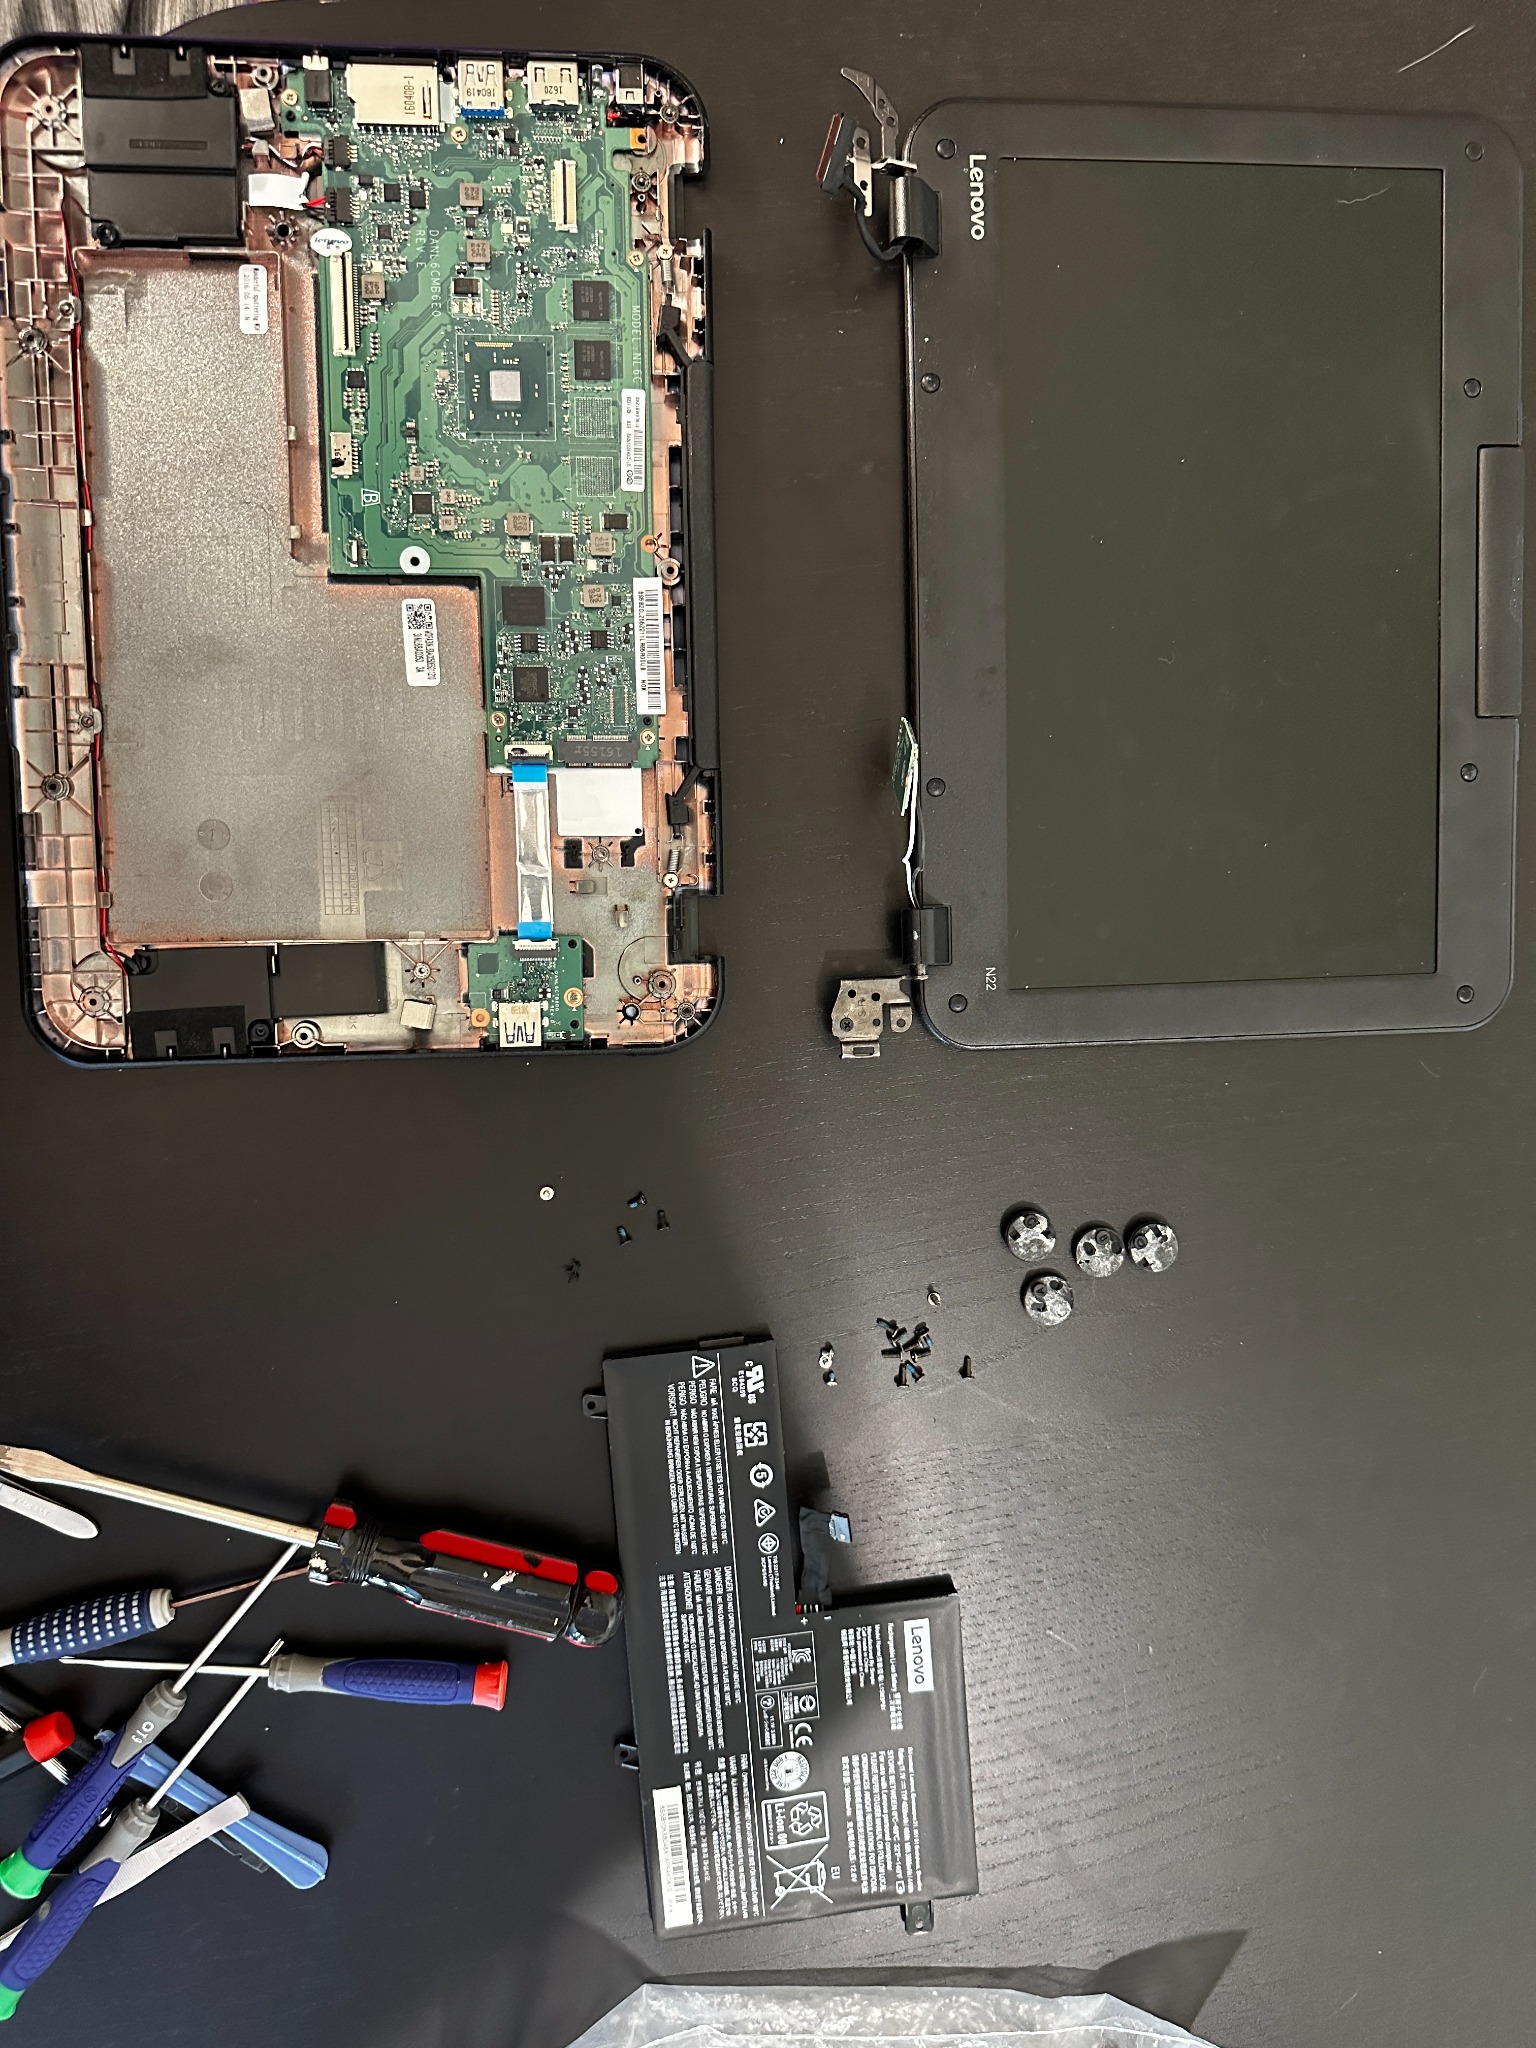 Complete disassembly: separating the display assembly, base unit, and battery to understand which parts are structural vs cosmetic.
The Modification Process
Step 1: Exploration and teardown
The first step was carefully opening the Chromebook and mapping out all the internal components. I documented which screws belonged where and how the display assembly connected to the base. This exploratory phase helped me understand what was structural and what could be removed.
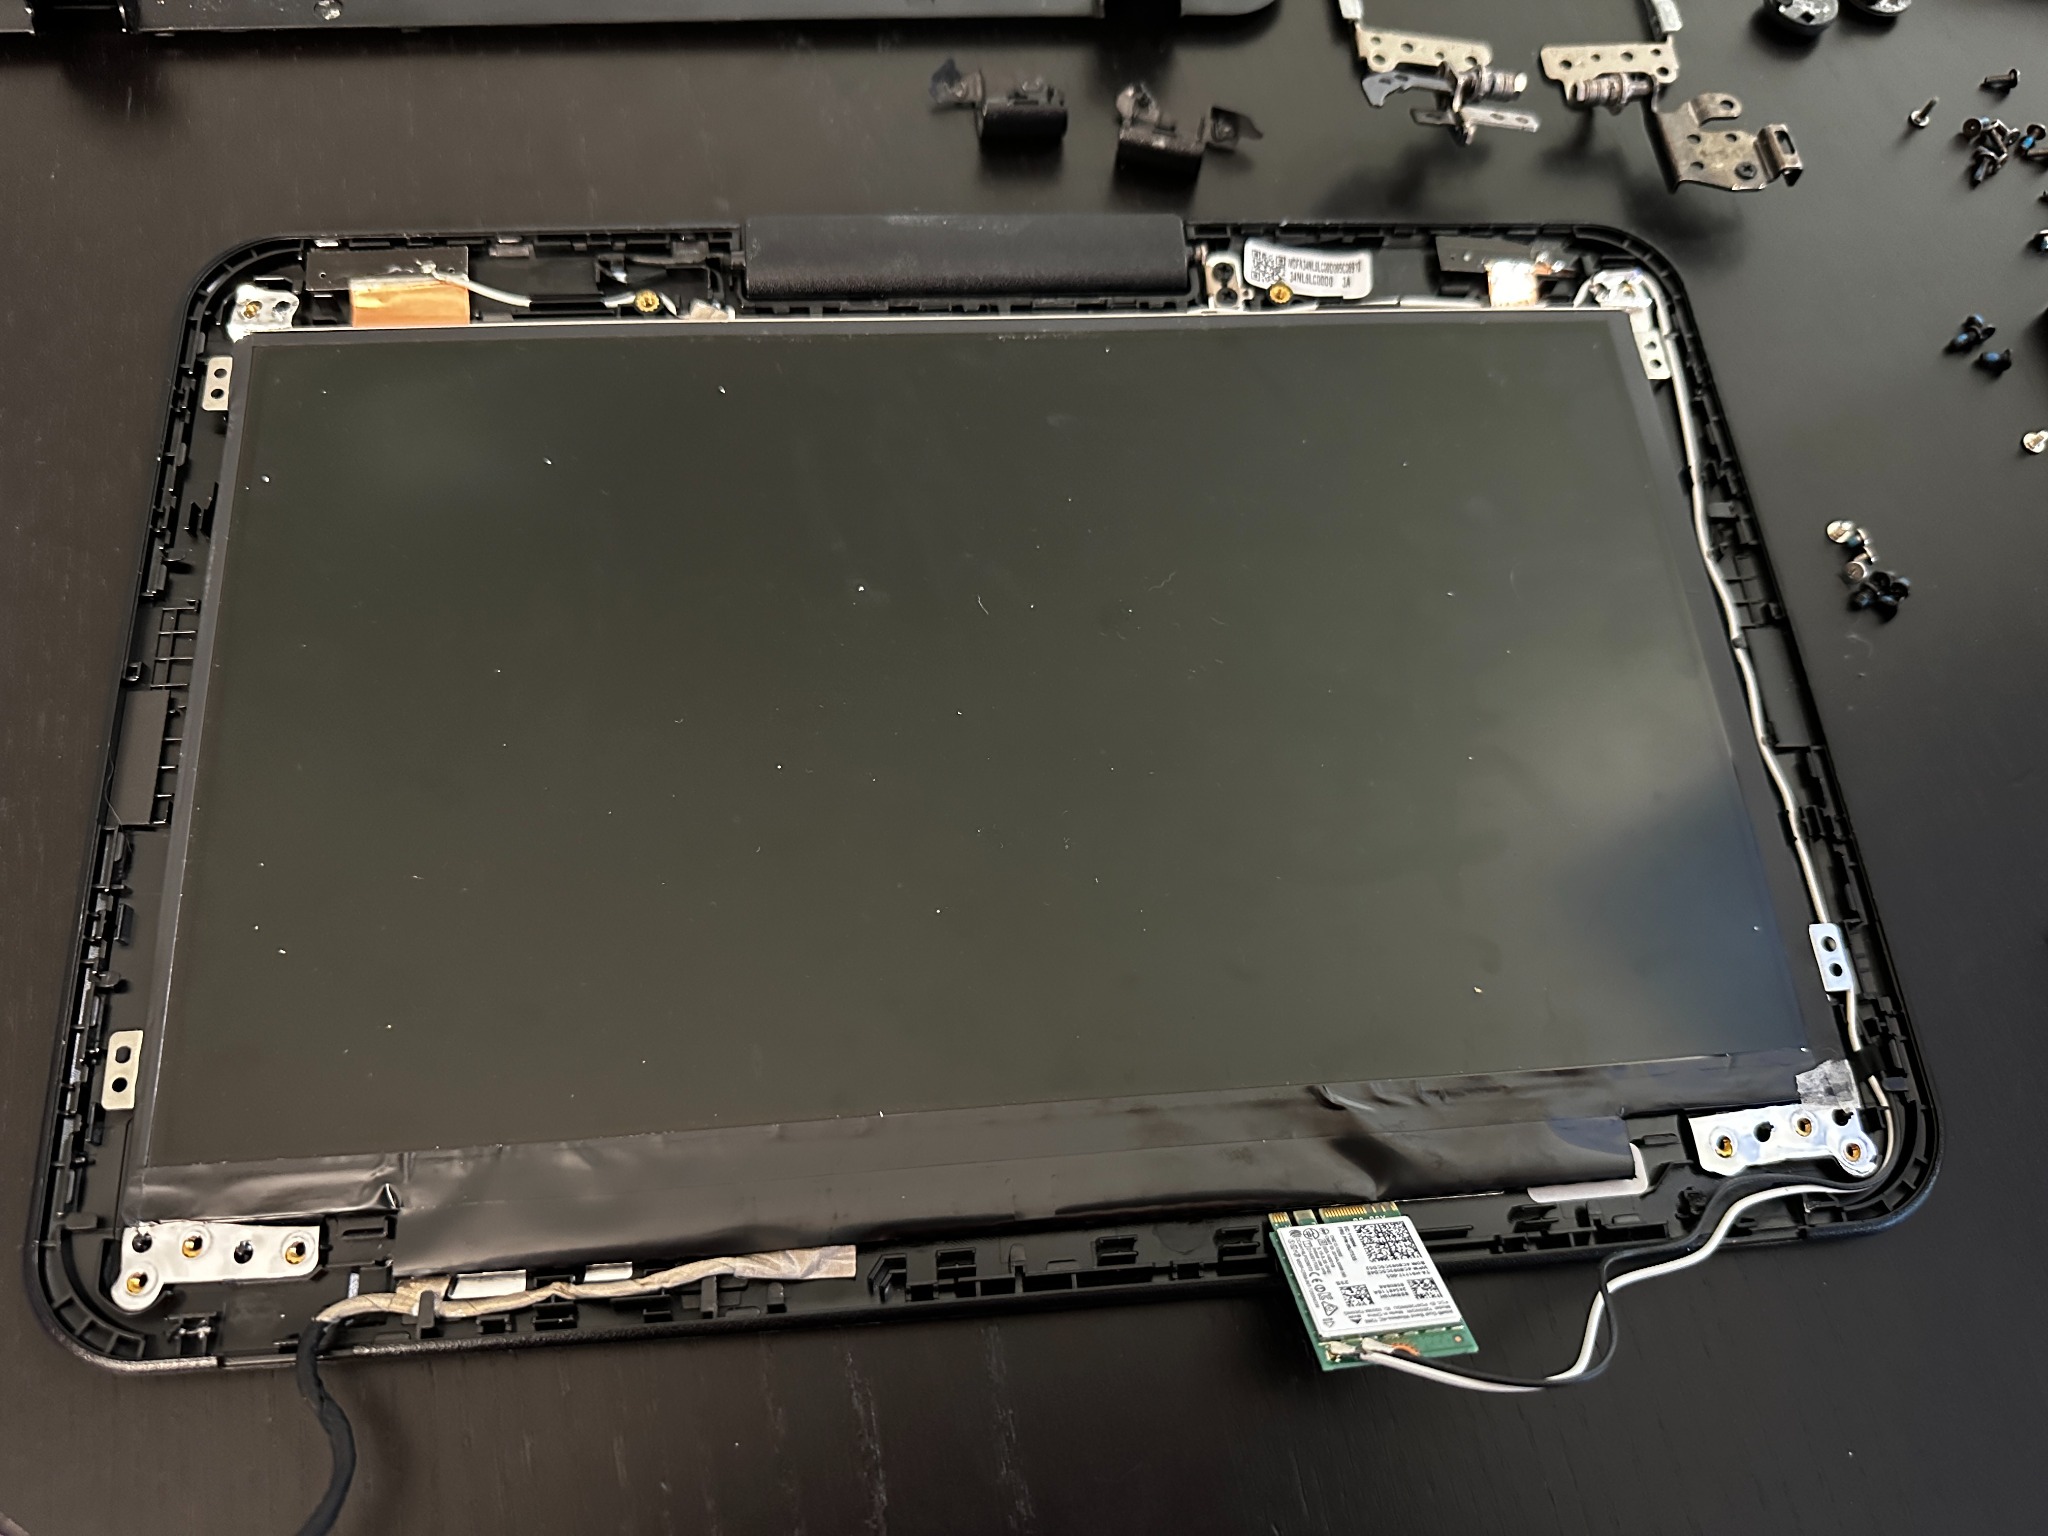 Stripping down the lid assembly to expose the raw LCD panel and understand mounting points.
Step 2: Hinge modification
The stock Chromebook hinges only allowed the screen to open about 120 degrees—standard for a laptop. I needed to modify the hinge mechanism to support a full 360-degree rotation. This involved removing hinge covers, adjusting the mechanical stops, and ensuring cable routing could handle the new range of motion without binding or pinching.
 Sorting through lid hardware to determine which pieces are essential for strength versus just cosmetic.
Step 3: Test assembly
Before committing to the final configuration, I reassembled the device to test that everything still worked. I verified that the screen, keyboard, trackpad, and all connections functioned normally after the modifications. This sanity check ensured I didn't break anything critical during the teardown.
 Test reassembly with the modified hinge to ensure all electronics work and cables route safely.
Step 4: Boot verification
With everything back together in standard laptop form, I powered it on to confirm ChromeOS still booted and all hardware functioned correctly. This was the final checkpoint before moving to the dedicated display configuration.
 Sanity check: the Chromebook fully reassembled and booting normally to verify nothing was broken.
Step 5: Display mode testing
I tested the device in its new tablet-style orientation, with the screen facing forward and the keyboard folded completely behind. This proved the hinge modifications worked and the device could function as a dedicated screen without interference from the keyboard assembly.
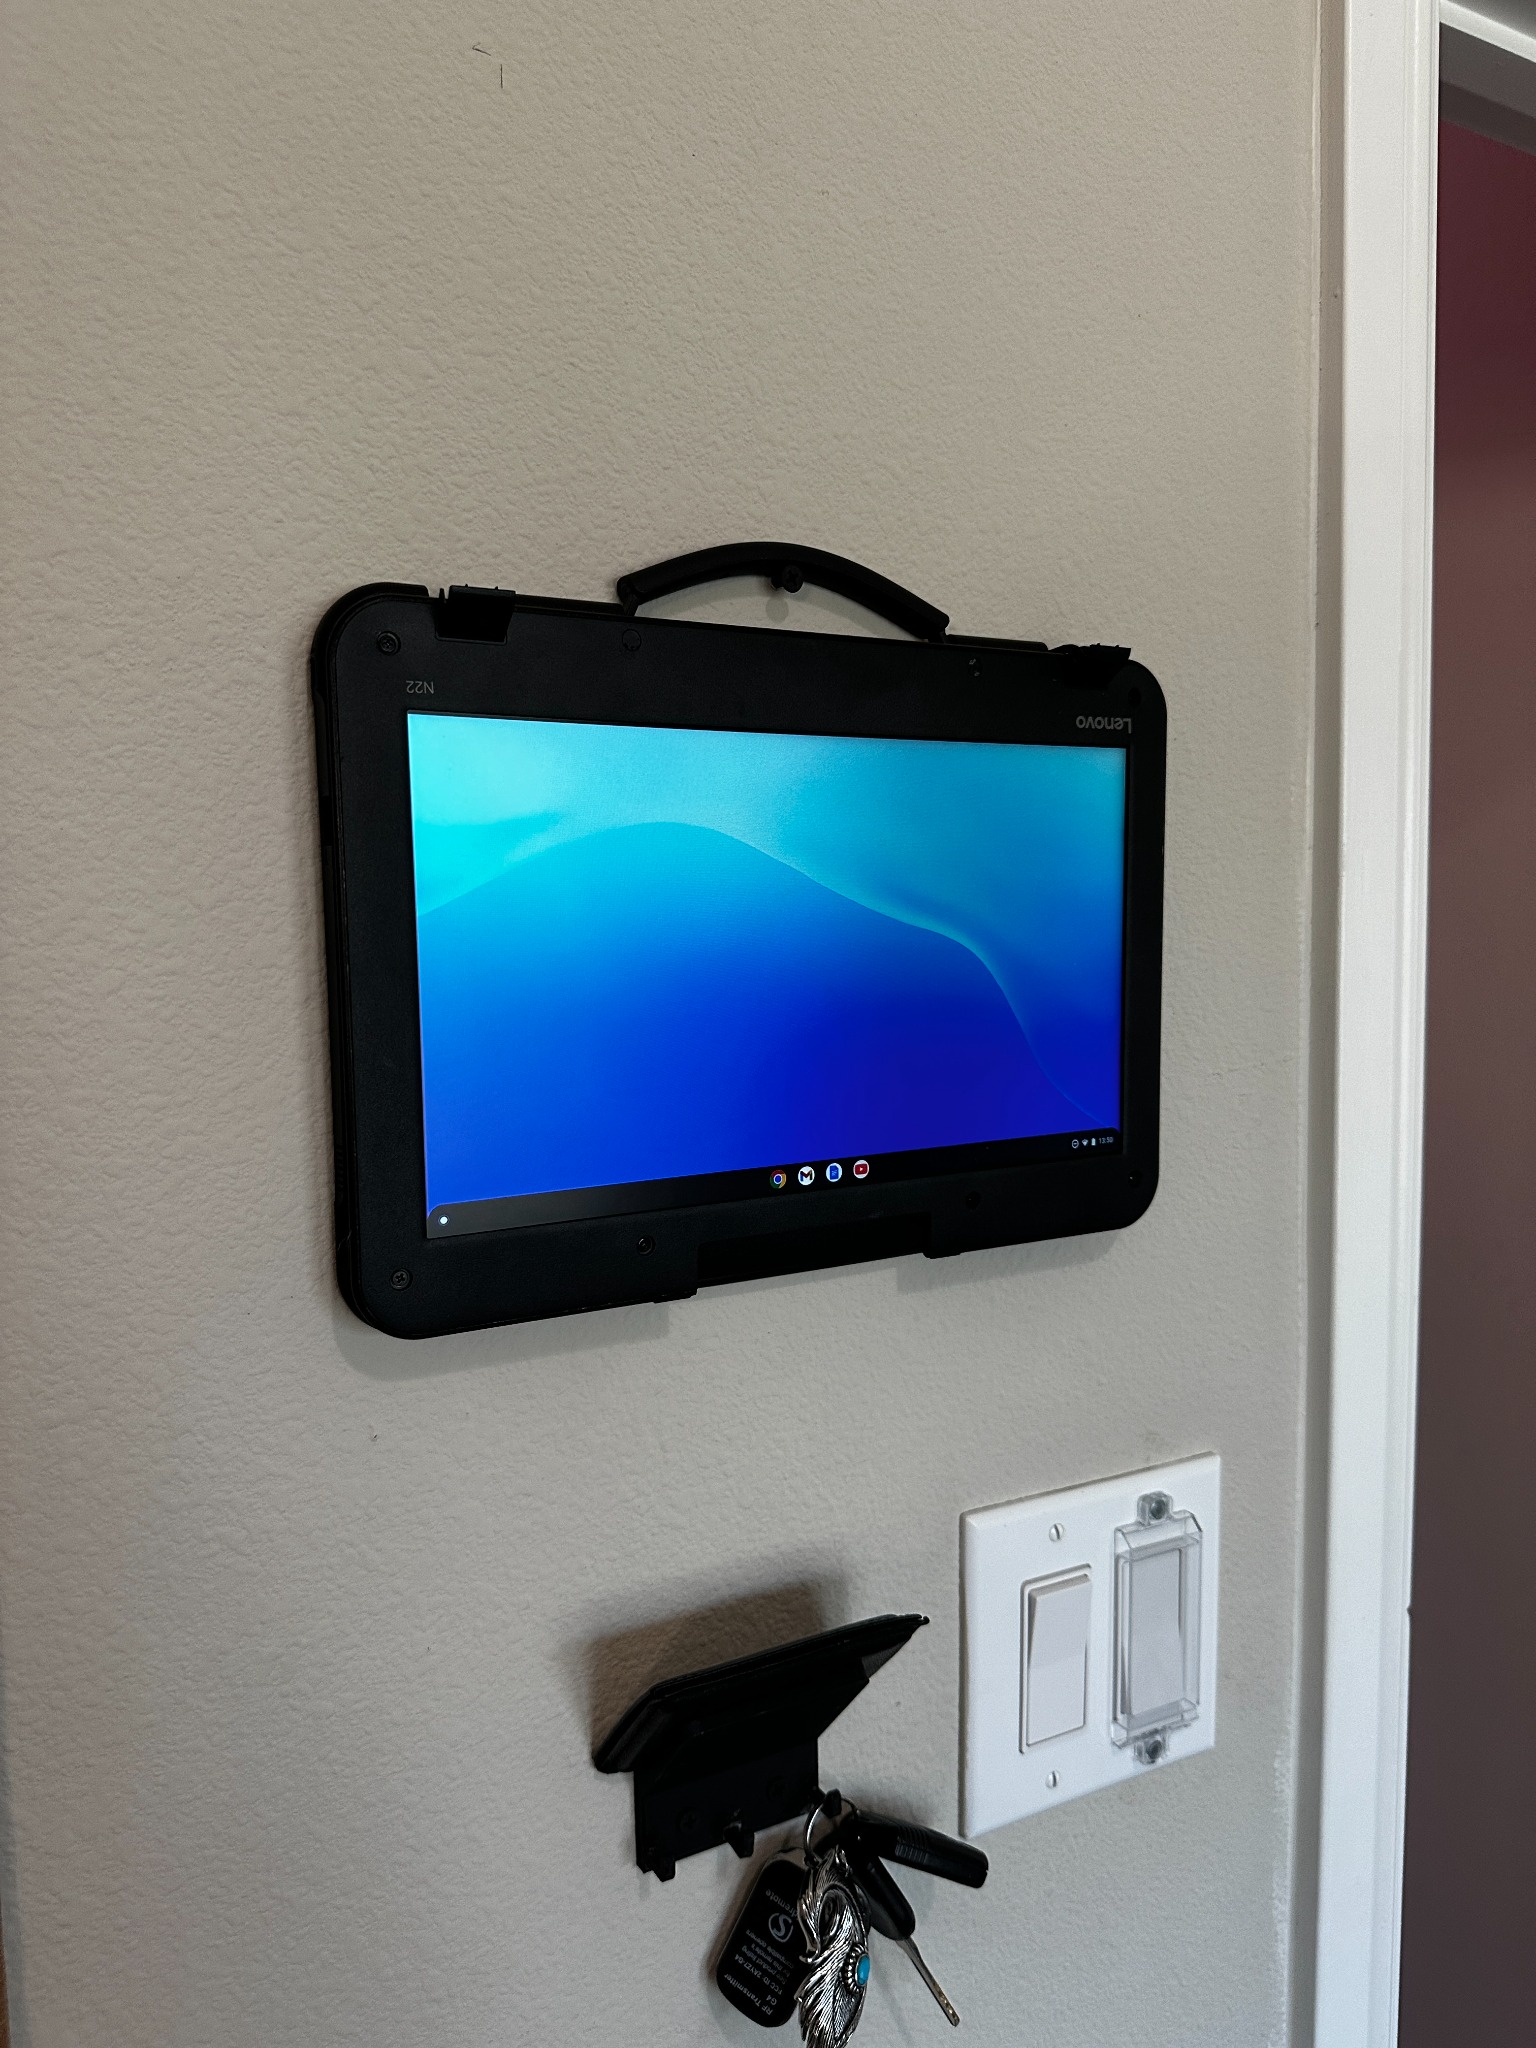
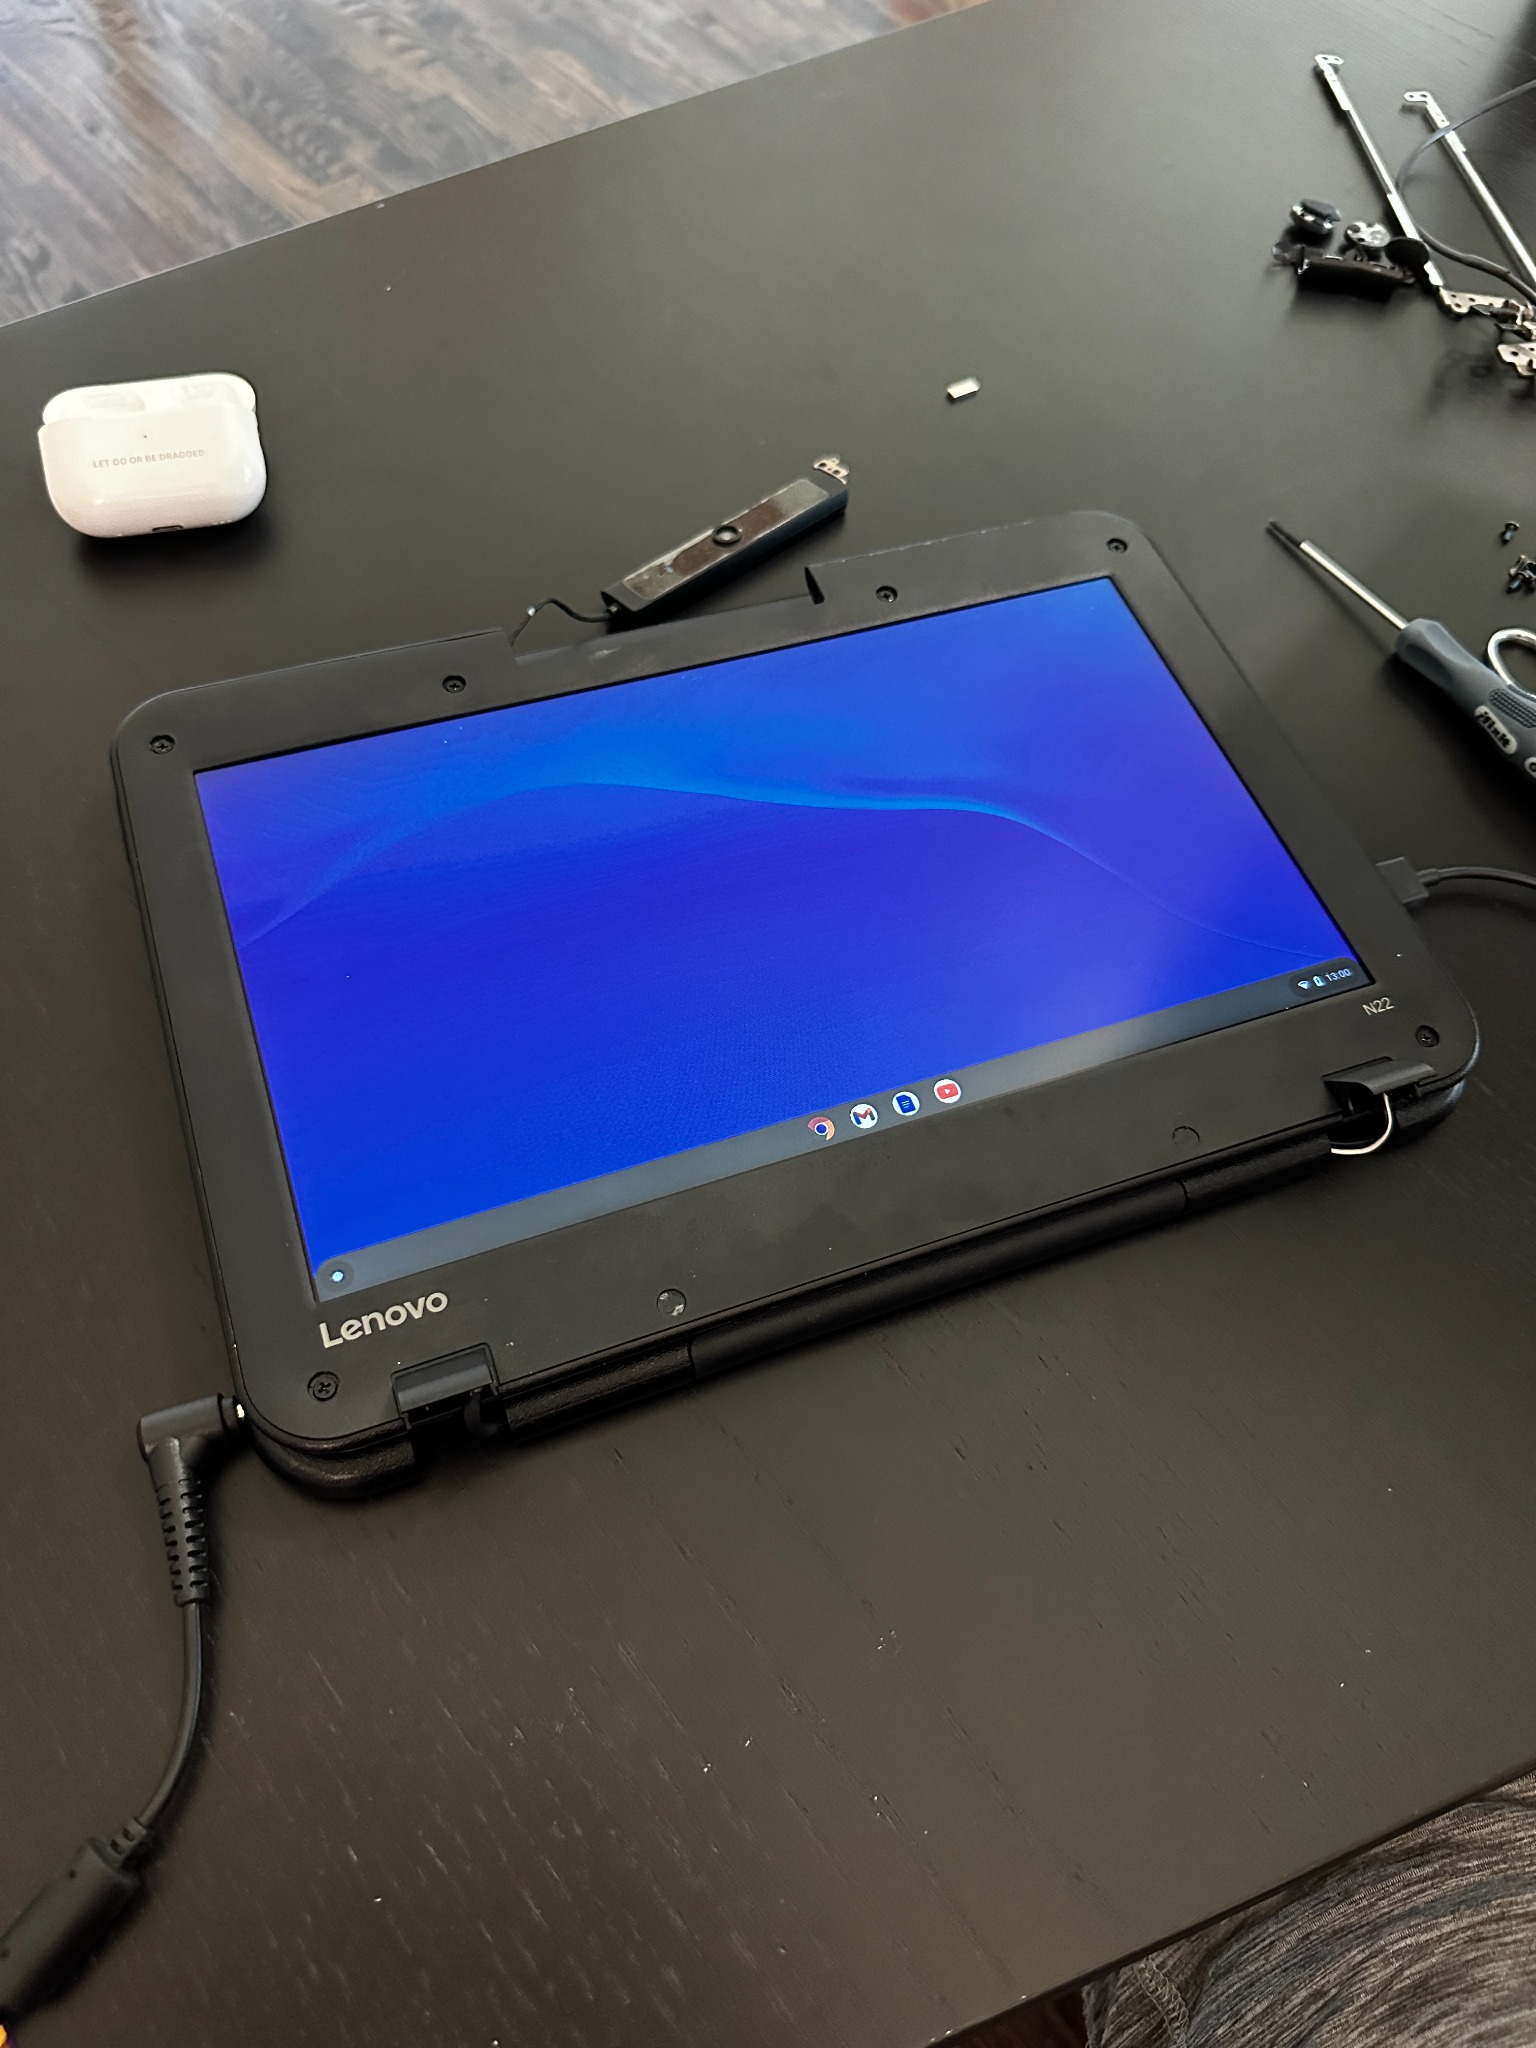 Testing the display in kiosk mode with the keyboard hidden behind, confirming the hinge and cables handle the new orientation.
Impact
What it accomplished:
- Created a functional digital photo frame for under $100 using a refurbished Chromebook
- Paired with the 3D-printed wallet holder to create a complete entryway command center
- Demonstrated that consumer electronics can be repurposed beyond their original form factor
- Avoided e-waste by giving old hardware a new dedicated purpose
What changed:
- Transformed an underutilized device into a daily-use household display
- Created a centralized spot for photos, reminders, and information by the door
- Learned hardware modification techniques applicable to future projects
- Built confidence in disassembling and modifying consumer electronics safely
Challenges & Solutions
The biggest challenge was understanding which components were structural versus cosmetic. Opening a laptop for the first time, everything looks important. I had to carefully analyze each part to determine what could be removed without compromising functionality or stability.
The hinge modification was tricky because I needed to maintain structural integrity while allowing a much wider range of motion. I solved this by carefully documenting the stock hinge mechanism, then incrementally testing modifications to ensure cables wouldn't bind and the screen would stay secure in its new orientation.
Cable routing was another concern—laptop cables are designed for a specific range of motion. I had to verify that display cables, Wi-Fi antennas, and power connections could all handle the 360-degree rotation without pinching or breaking over time.
What I Learned
I learned that consumer electronics are more modifiable than they appear. With patience and careful documentation, you can safely disassemble complex devices and understand their internal structure. The key is taking photos at every step and organizing screws and parts methodically.
I also learned the principle of "design by subtraction"—sometimes the best modification is removing unnecessary parts rather than adding complexity. By stripping away cosmetic elements, I made the Chromebook look intentional in its new role rather than like a hacked-together laptop.
Most importantly, I learned that repurposing existing hardware often yields better results than buying dedicated devices. The Chromebook display has full network connectivity, automatic updates, and can run any web-based application—features that cheap digital photo frames lack.
Future improvements:
- Add a cleaner mounting solution with integrated cable management
- Configure motion sensor to wake the display when someone approaches
- Build a custom web app for weather, calendar, and photo rotation
- Create a 3D-printed frame to make the display look more finished
Links
- Hardware: Lenovo N22 Chromebook (refurbished)
- Related Project: 3D Printed Wallet Holder (paired entryway organizer)
- Tools Used: Plastic spudgers, precision screwdrivers, documentation photos